Using Server-to-Server Sharing
ownCloud 7 introduces a powerful new feature, server-to-server sharing. With
just a few clicks you can easily access shares from other ownCloud 7 servers,
link them to your account, and create your own shares. This feature enables you
to:
- Selectively share files or directories.
- Combine two private clouds into a single public cloud.
- Eliminate the need to create user accounts on multiple ownCloud servers.
- View files in a Web browser or ownCloud client.
Note
Server-to-server sharing requires that both servers are running
versions of ownCloud that support this feature; currently this is ownCloud 7.
Creating a New Share
Server-to-server sharing is enabled on new or upgraded ownCloud 7 installations
by default. (See “Configuring Server-to-Server Sharing” in the Administrators
Manual.) Follow these steps to create a new share:
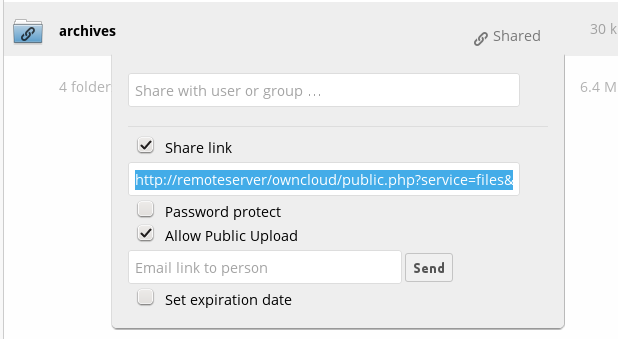
1. Go to your Files page and hover your cursor over the file or directory
you want to share to expose your administration options. Check the Share
Link checkbox to create the share, and to expose all of your sharing options.
2. Set any options that you want to apply to your new share: send an email
notification, add password protection, allow users to upload files to the share,
or set an expiration date. If you check Allow Public Upload then other
users can overwrite, rename and delete files in the share.
And that’s all there is to it. Your new public share is labeled with a chain
link. If you do not protect it with a password, it is visible to anyone who has
the URL. (ownCloud server admins have the option of requiring users to set
passwords on shares in Admin > Sharing.)
Connecting to a Remote Share
Open the share link in your Web browser.
2. Click the Add to your ownCloud button, and enter the URL of your ownCloud
server. If you are not already logged in you will get a login window.
3. After logging in you will see a dialogue asking you "Do you want to add the
remote share [share name] from [remote server name]?"
4. Click the Add Remote Share button, and enjoy your new share. It is marked
with a share icon, and the name of the share’s owner and originating server.
Remove your linked share anytime by clicking the trash can icon. This only
unlinks the share, and does not delete any files.


